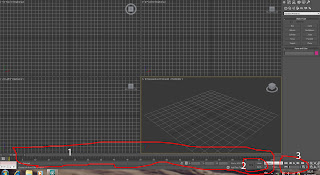
- The Track Bar
- Key Framing Controls
- Playback Controls

Using AutoKey.

At the base of the 3DS Max interface on the left hand side you can see Auto, Set K and a button with the image of a key on it.
There is also a time line at the bottom of the interface, with a slider, which is called the Track bar.
Autokey is an automatic way of animating with 3DS Max. Click on the Autokey button and you will notice that the track bar and the viewport you are using for your animation will turn red. This is a warning to say that you are in animation mode.
Click and drag a sphere onto the desktop and position it at the top of the front viewport.
Now move the trackbar slider to frame 25. Now move the sphere to the bottom of the fr
ont viewport. Move the trackbar slider to 50, and move the sphere across to the left side of the viewport., repeat this at 75 and move the sphere to the upper left hand side of the viewport. Now turn autokey off.

Now if you slide the slider of the trackbar, you will see your animation, or you can turn on the animation using the Play animation buttons. If you go to the motion panel, and click on the
trajectory button, you can see the trajectory of your animation.
You will notice that everytime that you moved the sphere, a key was created in the trackbar. Shift and click on the key at 0 on the trackbar. This will allow you to copy the key, Drag it to 100 on the trackbar, and now the sphere will return to its original position.
Autokey always places a key at 0 automatically.
Using Set Key

Set Key is not an automated process, and is useful if you want more control over your animation, for instance if you wish to pose a character.
Therefore at 0 on the trackbar you need to click on Set K (this will turn the trackbar red) and then press the button with the key on it. This then sets the key in the timeline
Now move the trackbar to 25, move the sphere, and press the button with the key on it. Scrub the trackbar to see your animation.
No comments:
Post a Comment